

Messenger settings
You configure the Messenger integration under WooCommerce → Settings on the Shipping → Messenger tab. You adjust the shipping price the usual way through WooCommerce → Settings → Shipping, just as you’re used to. If you haven’t installed the plugin yet, you’ll want to start with the Plugin installation article.
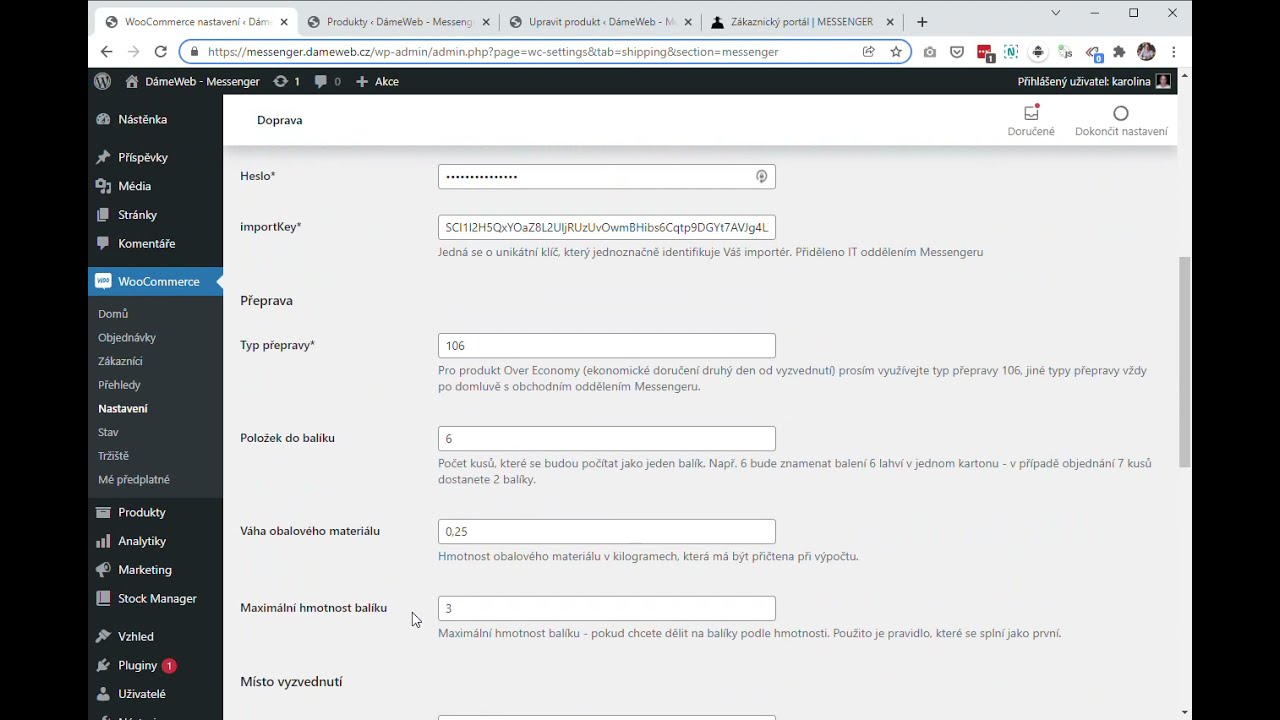
Basic settings
Section titled “Basic settings”Below we’ll go through the individual plugin settings in WooCommerce → Settings → Shipping → Messenger that you need to adjust before you start using it.
1. Integration
Section titled “1. Integration”-
Enter your username and password (the same ones you use to log in to the Messenger portal).
-
Enter the importKey, which you should receive from Messenger. If you don’t have it, contact their support.
-
To start, I recommend enabling debug logging, which stores every request sent to Messenger so you know what’s happening in your shop. Once you’ve finished testing, you can turn logging off. Requests that Messenger rejects outright as invalid are logged either way.
Most errors (missing data and the like) won’t be logged, because Messenger doesn’t process requests in real time. If such an error does happen, they usually give you a call, so there’s no need to worry.
2. Shipping settings
Section titled “2. Shipping settings”Set the shipping type – unless you’ve arranged a special one, leave it as type 106 (economy delivery, the day after pickup). The number is how Messenger distinguishes the products and services agreed on your contract (for example a shipping type with the Age Check service). Keep in mind it’s a global setting — it applies to every Messenger shipping instance, not per shipping zone.
For Messenger to work correctly, the plugin has to pass the number of packages and their weight rounded to whole kilograms. Because with multiple packages WooCommerce can’t guess how you’ll want to pack the shipment, I agreed with Messenger that the total weight of all packages will be divided across their number (i.e. it doesn’t reflect the actual packing), but it should be enough for adjusting the price.
The shipment weight is calculated from the product weights (how to add a product’s weight?) plus the weight of the packaging material. You can enter that in the Packaging material weight setting.
You can influence how many packages the goods are split into in two ways (whichever condition is met first applies):
- Items per package – the number of pieces in a single package (useful e.g. when shipping bottles of wine and the like).
- Maximum package weight – if you have lots of small items that are better packed together, you’ll probably want to set a maximum package weight and a very high number of items per package (e.g. shipping cosmetics).
If you need to change these values for specific cases, you can use the available filters, which your developer will surely handle.
3. Pickup location
Section titled “3. Pickup location”In this section, enter the details of who will send the packages on your behalf and where they can be picked up.
4. Activation, adding the shipping method, and a test
Section titled “4. Activation, adding the shipping method, and a test”Once all the basic settings are ready, go back to the very top of the settings and enable the integration by ticking Enable – Send orders to Messenger.
Now it’s time to set up the Messenger shipping method:
- On the WooCommerce → Settings → Shipping tab, in your shipping zones choose the zone in which you want to ship goods via Messenger.
- Click the Add shipping method button and select Messenger.
- Set the price and a custom name for the shipping method.
Once that’s set up, you can send a test order to Messenger, which you’ll find in the test portal on the Shipment overview → All shipments tab.
The order is sent when it reaches the Processing status, i.e. after payment has been entered.
If everything is in order, you can turn off test mode.
Cash on delivery
Section titled “Cash on delivery”The plugin automatically handles passing the cash-on-delivery amount for the standard “Cash on delivery” (COD) payment and for the Cash on delivery method added by WooCommerce Shipping. If you need another payment method to be treated as cash on delivery, you’ll need to adjust it with a filter; if you’re not sure how, write to me.
Tracking delivery status
Section titled “Tracking delivery status”If you want to track an order’s delivery status in the admin, you need to send Messenger the address of your REST API that will process the shipment statuses. You’ll find it under WooCommerce → Settings → Shipping → Messenger:
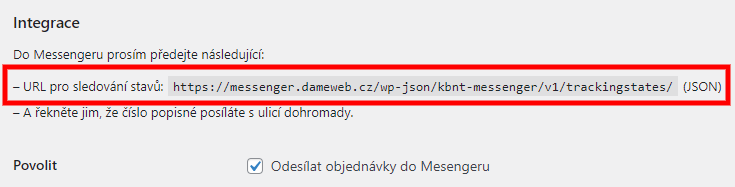
With each status change, a new note is added to the order. On delivery, the order status then changes to Completed.
Adding product weight in WooCommerce
Section titled “Adding product weight in WooCommerce”For everything to work correctly, every product you offer must have its weight set, which you can verify under WooCommerce → Settings → Products → Inventory.
You can set it in the product detail under Product data → Shipping.
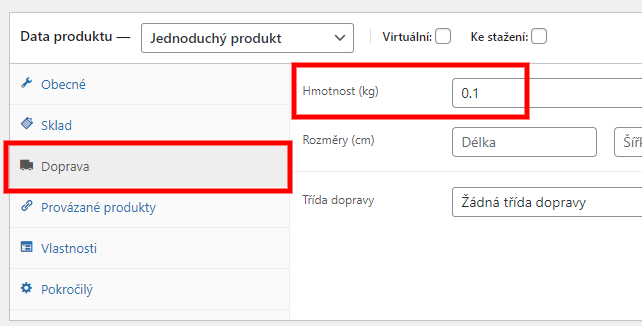
Setting the weight in the product detail.
Alternatively, on the Products list you can use Quick Edit, or even the Edit bulk action if you have several products that weigh the same.
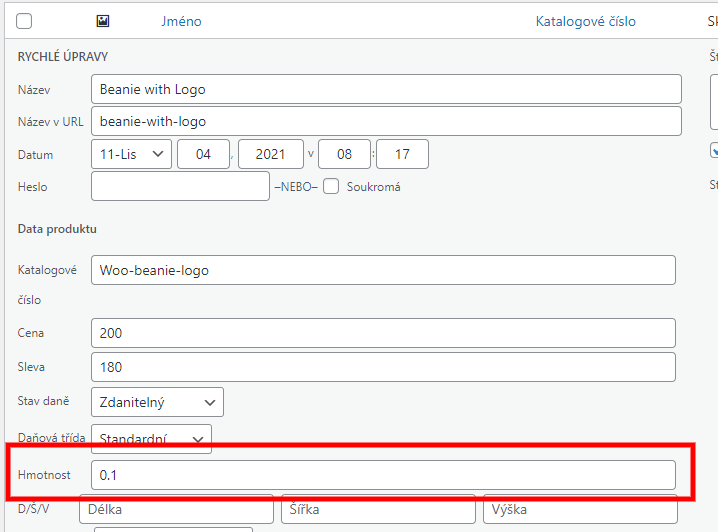
Adding or editing a product’s weight from the Quick Edit menu on the products list.

Was this page helpful?
Thanks for the feedback!
Sorry to hear that. Tell me what was missing and how I can help →